I am a firm believer that understanding the fundamentals are the key to creating amazing nails. True efficiency is taking the time to perfect each step before moving on. Rushing the process only creates failures farther along. Something as simple as tip placement is so trivial but is such an imperative stepping stone for your creation. It sets the foundation for acrylic extensions. Imagine spending hours creating the perfect design, only for them to pop off in a few days, and the issue was as simple as correct tip placement!
 The nail has not been prepped.
Let me walk you through creating a seamless extension. The first few steps are simple as you take time to prep the natural nail.
Remove any existing polish, gel or acrylic before you begin. Carefully prep the nail, and perform your preferred cuticle care.
Make sure that the cuticle is pushed off the nail plate, but take caution when cutting your client’s cuticle.
Tip! When adhering your nail tips, be sure to find the right size for each finger—to create a secure bond and the right fit.
 This is after prepping the nail.
Right on Track
Blend the tip, then apply your choice of dehydrator and primer. Once the nail is prepped, you are ready to apply your acrylic.
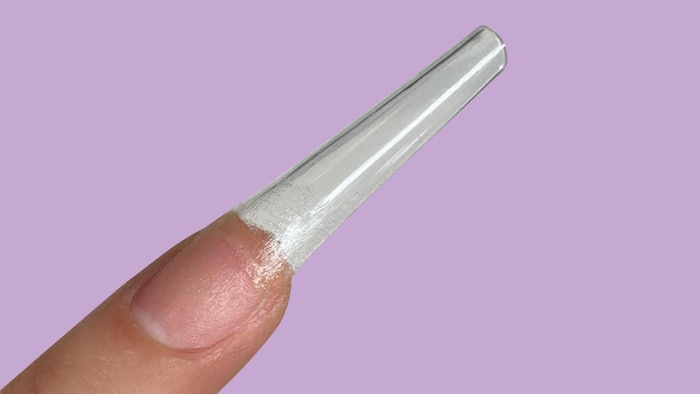
 The tip should be the same width as the nail plate.
To ensure the most efficient application and prevent surprises or issues in the middle of your service, know your products ahead of time. Be familiar with your choice of products, as different monomers and powders react dissimilarly and set at different times. The products you use not only affect your timing but your acrylic consistency as well.
Do your research, and get to know your products. Work on controlling your acrylic bead by understanding the liquid-to-powder ratio.
 The tip is well-blended into the nail plate.
Tip! If your bead is too runny and hard to keep on the nail, you have used too much liquid.
Practice Makes Perfect
Practice making beads until you understand the timing, consistency and size that is necessary for each type of nail. Longer nails will require bigger beads. You will want those beads to be created with a slower setting powder, which allow you more time to mold and shape your bead. Using a high-quality powder will allow you to cover longer nails—often with two beads or even a single one of acrylic. This method saves time and energy because you no longer need to create or blend multiple small beads to reach full nail coverage.
 The bead is a good size with the right consistency.
Once your acrylic has hardened and set, you are ready to shape your nails! A good, clean shape can make or break your nail design.
Do your research, and get to know your products.
Tip! If the bead gets hard too quickly and is difficult to mold, then your bead has too much powder.
Weak structures can easily break. Flooding around the sidewall is a common sign of runny beads.
Study your liquid-to-powder ratio because it will help with your applications. Practice with the same brand to get comfortable and familiar with the products, as companies make products with various consistencies. Also, keep in mind that temperature makes a difference in affecting your consistency.
 The cuticles are not flooded, the sidewall is clean and the nail bed is smooth with a perfect apex.
With time and practice, you will get better with application, which is fundamental to your knowledge and foundational for your success.
About the Author:
Lorenz Medina (@lbc_lolo) is the founder of the Let’s Build Confidence movement. He has been doing nails for almost 12 years and encourages everyone to "follow your passion, and listen to your heart."