Malin Schlott (@malinsnagelkonst) and Emelie Westin (@beautiful_in_light) share everything you need to know about how to find quality crystals and apply them to make your clients bling.
Crystals or rhinestones can be manufactured in both plastic and glass. Glass crystals have a better endurance than the plastic ones, which will wear out more easily in everyday use. No matter if you use plastic or glass crystals, they come in different cuts or facets.

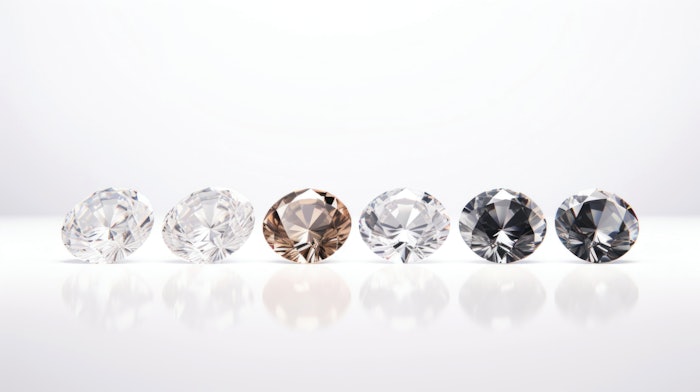
The crystal cut determines how sparkly the crystal is and what pattern you see when you look at the crystal. More facets equals more sparkle and brilliance. If you’re lucky to get your hands on a 16 faceted crystal, you can see the shape of a star when looking at it from the top. This is by far our favorite crystal cut. Notice that they all have a girdle on the bottom. We will come back to that later.
Colors, Shapes and Sizes
Have you ever wondered why crystal sizes come in terms of SS? SS stands for Stone Size and is a universal measure used to describe the size of the crystal. A smaller number means a smaller size. While SS1 is the smallest size, SS3 is usually the smallest size used in the nail industry. Different countries use different types of measuring systems.

Using stone size is easier than having to measure the crystals in all different systems around the world. Second of all, the crystals in one stone size aren’t exactly the same size, they have a slight size margin; therefore, it’s also easier instead of having to say the whole measurement range. Crystals come in a huge variety of colors and shapes.
Crystals and Lead
Using crystals that are lead-free is extremely important. Some crystals may contain lead oxide to give the glass a more reflective appearance, since the light passes through faster. Lead oxide is toxic to breathe in. This is especially harmful when filing the crystals during removal. If you use crystals that contain lead, remember to never file them. Use a cuticle nipper to remove them.
Crystal Placement
When it comes to long lasting crystal applications, the key is using a gel with the right viscosity. If you are doing a crystal design where the whole nail will be covered in crystals and caviar beads, you will need a gel with low viscosity. The low viscosity will make the nail more flexible, which is necessary for that type of design. However, using a gel with low viscosity can be “trying to the patience” due to the crystals not staying in place while attaching the rest of the crystals. Working fast with a pick up tool is the only way.
Always make sure to cover the crystals’ girdle in gel. This can be done when attaching them in a generous coat of a low viscosity gel, but it’s also possible to attach the crystals with a small amount of gel, cure, then go around the crystals with a top coat using a thin brush. This is a great method when you're not covering the whole nail with crystals, since you have to topcoat the rest of the nail anyway.
If you want to attach chatons, you will need a gel with a high viscosity or a drier acrylic bead. The best way to attach them is to apply an amount of gel or acrylic and stick the chatons in it as a “cluster," consisting of three chatons. This way the appearance of the design will look the best, since you won't end up with the sides visible.

Caviar beads are not only for decoration. They also help the crystals stay in place. By placing them close to the crystals, they hold on to the girdle, making it harder for the crystals to fall off.
It can be hard to find inspiration when it comes to creating a crystal design. When combining crystals, you first need to decide on a color scheme. Choose colors that work well with the client’s chosen nail colors. It can be wise to choose one or two shades of the same color and mix it up with a neutral. The neutral could be white, silver or gold, etc. Start in the middle with a bigger crystal (this could be of a different shape), and work your way up and down the nail with smaller crystals of various sizes. Finish it off with caviar beads to make it even more appealing by resembling jewelry.
If you’re still out of inspiration, we recommend that you save pictures of crystal maps on your phone. When the client asks for crystals, you simply look at the crystal maps already on your phone. Never apply top coat over your crystals. Some people believe that it's necessary to prevent them from falling off. This is not true. If you have secured them enough in gel, there should be no need to apply a top coat over them. In addition to that, the top coat will destroy the crystals' brilliance and sparkle. Not only can you apply crystals to your nails, you can also apply crystals to items. Tumblers, shoes, phone cases and Air Pod cases are some examples of what you can decorate with crystals. This is something called crystalize, and the possibilities are endless. When you crystalize, you need to make sure you use the correct adhesive depending on what you are applying the crystals on.
About the Authors:
Emelie Westin is a nail artist, international educator and influencer. She is the co-founder of Nail Art Queens and owner of Design in Light. You can follow her on Instagram, TikTok and Facebook @beautiful_in_light.
Malin Schlott is a nail artist, international educator and influencer. She is the co-founder of Nail Art Queens. You can follow her on Instagram @malinsnagelkonst.


