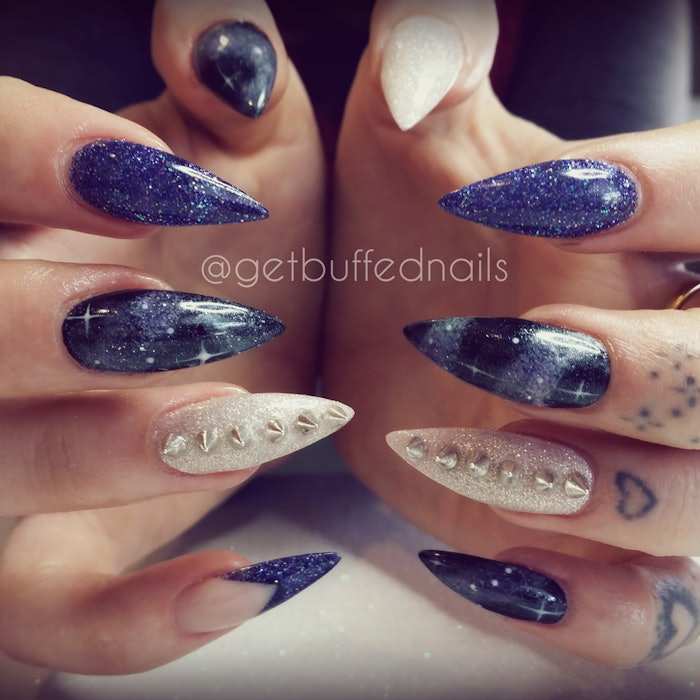
Sarah Elmaz of Get Buffed Nails has remixed the galaxy nail by pairing it with studs and a pointed shape. Try out the same look on your clients. Here’s how to get her galaxy effect.
What you will need:
Makeup sponge
White polish and a few extra bright colors
Pinchers/tweezers
Dotting tool
Fine nail art brush
1. Start with a black base color. Remove the tacky layer if using gel. Allow to fully dry if regular polish.
2. Rip off a few small pieces of sponge and hold with the pinchers.
3. Dab gently into the white polish.
4. Dab onto the nail in the shape you want your milky way/galaxy to be. Cure when you’re happy with the shape.
Note: It should look something like this.
5. Keep adding the other colors in random spots with the same technique, curing between each layer. (I have used one glittery polish to add a star effect).
It will start to look something like this.
6. With a dotting tool, add small but random sized dots.
7. Using a small nail art brush, you can pull out some lines on the dots to make them look like stars. Cure.
Note: It should look like this.
8. Add a layer of fine glittery/shimmery polish to add a night sky effect and cure.